Replacing Old Bathroom Pipes Cabo Roig: When & How
Introduction
Replacing old bathroom pipes in Cabo Roig and Los Montesinos is one of those jobs that many homeowners only discover they need once the tiles come off the wall. In these coastal towns, where many properties date from the 1980s and 1990s building boom, ageing galvanised steel or even lead supply pipes can hide behind perfectly presentable bathroom finishes until a renovation exposes them. This guide explains when pipe replacement is necessary, what the work involves step by step, and the specific challenges we face in this part of the Costa Blanca.
Why Old Pipes Often Need Replacing in Cabo Roig and Los Montesinos
Many older homes in Cabo Roig, Los Montesinos, and surrounding urbanisations were built quickly during the tourist property expansion. Builders used materials that were standard at the time but have not aged well in the local climate and water conditions.
Galvanised Steel Pipes
Galvanised steel was common for water supply until the early 2000s. The protective zinc coating degrades over time, especially with the hard water typical in this region. Once the zinc layer fails, the steel corrodes from the inside, narrowing the bore and eventually causing leaks. I've opened walls in Cabo Roig apartments where the original 20mm supply pipe had corroded down to less than 10mm internal diameter, reducing water pressure to a trickle.
The coastal humidity accelerates external corrosion as well. Bathrooms in ground-floor flats or properties close to the sea often show rust stains on walls where pipes run, a clear sign that the metal is failing.
Lead Pipes
A few very old properties, particularly in the older parts of Los Montesinos village, still have short sections of lead pipe for internal supply. Lead is no longer permitted for drinking water anywhere in the EU, and any renovation that exposes lead pipework should replace it completely. The soft metal also becomes brittle with age and can crack when you try to disconnect fittings.
Hard Water and Limescale Build-Up
The water supply across Orihuela Costa, Cabo Roig, and Los Montesinos is notoriously hard, with high calcium and magnesium content. Over decades, limescale builds up inside pipes, particularly on hot-water lines where heat accelerates deposition. I've cut open 15mm copper pipes from 1990s installations that were more than half blocked with white scale.
This affects flow and pressure, but it also means that if you replace taps, showers, and a toilet without addressing the pipes, the new fittings will clog quickly and you'll be back to square one within a year or two.
Poor Original Installation
Some older properties were plumbed with a mix of materials—copper for part of the run, then a transition to galvanised steel or even plastic compression fittings that were never meant to be permanent. These joints are the first places to leak. When we strip out a bathroom, we often find previous "repairs" where someone has patched a leak with silicone or wrapped a joint in tape rather than replacing the pipe properly.
Signs That Your Bathroom Pipes Need Replacing
Before you commit to a full re-pipe, look for these warning signs during the planning stage:
- Low water pressure that hasn't been solved by cleaning tap aerators or the shower head. If pressure is weak throughout the bathroom, the supply pipes are likely restricted.
- Discoloured water when you first turn on a tap, especially a rusty or brown tint. This indicates corrosion inside steel pipes.
- Visible corrosion or rust stains on walls, floors, or around pipe penetrations.
- Damp patches or water stains on walls or ceilings below the bathroom, suggesting slow leaks.
- Noisy pipes: banging, rattling, or whistling when taps open or close can mean loose, corroded, or partly blocked pipes.
- Frequent leaks or repeated repairs to the same section of pipework.
- Age: if the property is more than 30 years old and the plumbing has never been updated, replacement during renovation is almost always worthwhile.
In practice, once we remove tiles and access the pipework, we can give a definitive assessment. Many homeowners in Cabo Roig choose to replace all bathroom supply and waste pipes during a renovation even if there are no obvious problems, simply because the walls and floors are already open and the marginal cost is low compared to doing it later.
Free visit and quote, fixed price in writing and a guarantee on the works.
What Replacing Old Bathroom Pipes Cabo Roig Actually Involves
Pipe replacement is not a quick patch job; it's a methodical process that runs in parallel with the demolition and first-fix stages of the bathroom renovation.
Survey and Planning
Before any demolition, we trace the existing pipe routes. In a typical Cabo Roig apartment, cold water enters from a mains riser (often in the kitchen or a hallway cupboard), runs to a water heater (electric termo or gas boiler), and then hot and cold lines run to the bathroom. Waste pipes slope down to a vertical soil stack, usually shared in apartment blocks.
We note:
- Where the supply enters and exits the bathroom.
- The route of hot and cold pipes (often buried in walls or floor screeds).
- The position of the soil stack and whether it's inside or outside the building.
- Any shut-off valves (many older properties have none, or they're seized open).
- Community rules if it's an apartment: some communities require notification or permission for work that affects shared risers or stacks.
Demolition and Exposure
Once the old bathroom is stripped—tiles, sanitaryware, and any boxing removed—the pipes are fully visible. We cut out the old supply pipes back to the entry point and remove waste pipes back to the connection with the soil stack or the point where they leave the bathroom.
In older buildings with solid walls, pipes were often chased into the masonry and then plastered over. Removing them can mean cutting channels that then need making good. In timber-frame or partition walls (less common here, but sometimes used in renovations), pipes run in the cavity.
Choosing New Pipe Materials
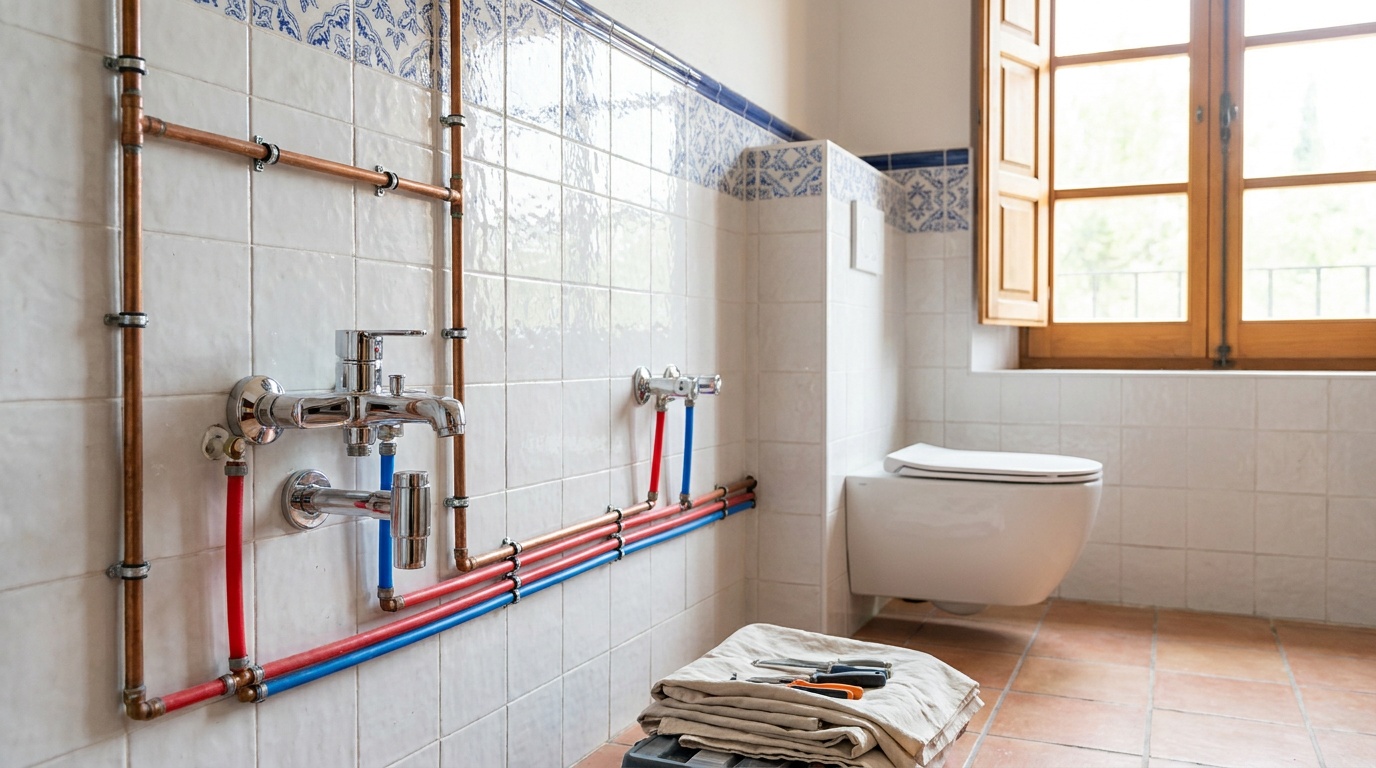
For water supply, the standard today is cross-linked polyethylene (PEX) or multilayer pipe (PEX-Al-PEX). These are flexible, resistant to corrosion and scale, and quick to install. PEX can be run in long lengths with fewer joints, reducing leak points. Fittings are either compression (easy to undo later) or push-fit (faster, but some prefer compression for reliability).
Copper is still used and is perfectly good, especially for exposed runs where you want a traditional look. It's more expensive and takes longer to solder joints, but it's durable and handles high temperatures without issue. In practice, most renovations in Cabo Roig and Los Montesinos now use PEX for concealed runs and chrome-plated copper or braided hoses for the final connections to taps and showers.
For waste pipes, we use PVC (grey or white, 32mm for basins, 40mm for showers and baths, 110mm for toilets). Modern push-fit waste systems with rubber seals are reliable and much easier to adapt than the old solvent-welded systems. All waste runs must have the correct fall—typically 1:40 to 1:100 depending on diameter—to prevent blockages.
Installation Sequence
Here's the typical order of work:
- Install new shut-off valves at the bathroom entry point, so you can isolate the bathroom without turning off water to the whole property.
- Run new cold and hot supply pipes from the entry point to the positions of the new basin, shower, bidet (if fitted), and toilet. We try to keep pipes accessible where possible—inside stud walls, under baths, or in purpose-built ducts—but some sections may need to be chased into walls or buried in floor screed.
- Pressure-test the supply pipework before closing it in. We pressurise the system to 1.5 times working pressure (typically around 8–10 bar) and leave it for at least an hour, checking for any drop that would indicate a leak.
- Install waste pipes, starting from the soil stack or drain connection and working back to each fitting. Every waste should have a trap (P-trap or bottle trap) to prevent sewer gases entering the bathroom.
- Connect to existing soil stack or drain. In apartment blocks, this is usually a shared vertical stack. If the connection point is corroded or damaged, we replace the branch connector. In detached houses, the waste may run under the floor to an external drain; we check the condition of this pipe and replace if necessary.
- Vent if required. Modern waste systems often use air-admittance valves (AAVs) instead of traditional vent pipes running to the roof. These allow air into the waste system to prevent siphoning of traps, but some community rules or older buildings require traditional vents.
Making Good and Preparation for Tiling
Once pipes are in and tested, we make good any chases or holes. Walls are re-plastered or patched with mortar, and floors are levelled if pipes have been buried in screed. The bathroom is now ready for waterproofing membrane (essential in wet areas), tile backer board if used, and then tiling.
Pipe outlets are left capped or with temporary plugs, clearly marked for the plumber to return and make final connections once tiles, shower tray, and sanitaryware are in place.
Timelines and Costs
Replacing all the pipework in a standard bathroom (basin, toilet, shower) adds roughly two to four days to the overall renovation timeline, depending on access and the complexity of the layout. If the property has solid concrete walls and we need to chase deep channels for pipes, it can take longer.
Material costs for a full re-pipe in a single bathroom typically run between €200 and €400, including PEX pipe, fittings, valves, waste pipe, traps, and fixings. Copper supply would add another €100–150. Labour is the larger component: expect the plumbing element of a full bathroom renovation to account for roughly 15–25% of the total project cost, and pipe replacement is a significant part of that.
Several factors push the price higher:
- Difficult access: apartments on upper floors with no lift, or properties where the mains entry is far from the bathroom.
- Shared risers in apartment blocks: coordinating work, notifying neighbours, and sometimes upgrading shared sections if the community agrees to split costs.
- Unexpected problems: once walls are open, we sometimes find additional issues—leaking mains entry valves, corroded water heaters that need replacing, or waste pipes that have sagged or cracked under the floor.
- Upgrading the water heater: if you're replacing pipes, it often makes sense to replace an old termo or boiler at the same time. A new electric water heater (50–100 litres, typical for a bathroom) costs €150–400 plus installation.
Companies like Reformas Baño Alicante include a detailed plumbing assessment in the free initial visit and quote, so there are no surprises once work starts. A fixed-price quote will specify exactly what pipework is being replaced and what is being reused, if anything.
Local Challenges and Practical Considerations
Hard Water and Water Softeners
Given the scale build-up in this area, some homeowners install a water softener or a magnetic/electronic descaler on the mains entry. A compact softener for a single bathroom costs around €300–600 plus installation and requires periodic salt refills. Descalers are cheaper (€80–200) but opinions are mixed on their effectiveness.
Even without a softener, modern PEX pipes are much less prone to scale build-up than copper or steel, and accessible shut-off valves make it easier to flush the system or descale taps and showers periodically.
Community of Owners Rules
In apartment blocks and urbanisations, any work that affects shared plumbing (mains risers, soil stacks, or drains) usually requires notification to the community and sometimes formal permission. The community may have rules about working hours (often 08:00–14:00 and 16:00–20:00 on weekdays, no work on Sundays or public holidays) and may require you to inform neighbours in advance.
If a shared soil stack is in poor condition, the community may agree to replace the entire stack and share the cost among the affected properties. This is worth raising at a community meeting if your surveyor finds problems.
Permits and Compliance
A full bathroom renovation that includes plumbing changes is usually classed as obra menor (minor works) and requires either a declaración responsable or a licencia de obra menor from the town hall, depending on the municipality and the scope of work. The plumbing itself must comply with the Código Técnico de la Edificación (CTE), particularly the sections on water supply (HS 4) and drainage (HS 5).
In practice, your contractor will handle this, but it's worth confirming what permits are included in the quote. Rules and fees vary by town hall, so check with the ayuntamiento in Orihuela (which covers Cabo Roig) or Los Montesinos.
Water Shut-Off and Restoration
Replacing pipes means shutting off the water supply for periods during the work. In a house, this is straightforward—turn off at the mains. In an apartment, if there's no individual shut-off or it's seized, you may need to arrange with the community to shut off the riser, which can affect other flats. We try to schedule this work efficiently and restore supply each evening if possible, but homeowners should plan for at least one or two full days without water in the bathroom.
Common Mistakes and How to Avoid Them
Replacing only the visible sections: Some homeowners try to save money by replacing only the pipes they can see or the section that's leaking. This is false economy. If one section has failed, the rest is likely not far behind, and opening the walls again in two years will cost far more than doing it all now.
Ignoring the waste pipes: There's a tendency to focus on supply pipes and overlook waste. Old PVC waste can become brittle, and joints can fail. If you're renewing supply, renew waste at the same time.
Not pressure-testing: A proper pressure test before closing walls in is essential. It's much easier to fix a leak when the pipes are still accessible than after you've tiled over them.
Mixing incompatible materials: Connecting copper directly to galvanised steel without a dielectric union causes galvanic corrosion and rapid failure. Always use the correct transition fittings, or better still, replace the entire run in one material.
Skipping shut-off valves: Install a shut-off valve for each fitting (basin, toilet, shower) and a main isolation valve for the bathroom. This makes future maintenance and repairs much simpler.
Underestimating the impact of hard water: Even with new pipes, hard water will scale up tap aerators, shower heads, and the inside of water heaters. Plan for regular descaling or consider a softener if your budget allows.
Is It Worth Replacing Pipes If They're Not Leaking?
This is the question I'm asked most often. The answer depends on the age and material of the existing pipes, your budget, and how long you plan to stay in the property.
If the pipes are galvanised steel or lead, or if they're copper or PEX but more than 25–30 years old and showing signs of wear (low pressure, discolouration), replacement during a renovation is almost always worthwhile. The marginal cost is low because the bathroom is already stripped and open, and you avoid the risk of a leak or failure in a newly finished bathroom.
If the existing pipes are relatively modern PEX or copper in good condition (installed in the last 10–15 years, good pressure, no leaks), you may choose to reuse them and just replace the final connections to new taps and fittings. A good contractor will advise honestly based on what they find.
In my experience across Cabo Roig, Los Montesinos, and the wider Orihuela Costa area, around 70–80% of bathroom renovations in properties built before 2000 include at least some pipe replacement, and about half include a complete re-pipe of the bathroom. The peace of mind and the performance improvement—consistent pressure, no leaks, no scale-choked pipes—make it one of the best investments in a renovation.
Preparing Your Home for the Work
If you're proceeding with pipe replacement as part of your bathroom renovation, a few steps will make the process smoother:
- Clear access to the bathroom and the route from the front door. Pipe sections, fittings, and tools need to be brought in, and waste materials (old pipes, tiles, rubble) carried out.
- Notify neighbours in advance, especially in apartment blocks. Plumbing work can be noisy (cutting channels, drilling for fixings) and there will be periods when the water is off.
- Arrange alternative facilities: you'll be without a working bathroom for the duration of the renovation (typically one to three weeks for a full refurbishment including pipes). If it's your only bathroom, plan to use a neighbour's, a local gym, or a family member's.
- Check your water heater: if it's old or undersized, consider replacing it at the same time. A plumber can do this in the same visit as the pipe work, and it's much cheaper than a separate call-out later.
- Confirm insurance and permits: check that your contractor has liability insurance (seguro de responsabilidad civil) and that all necessary permits are in hand before work starts.
Final Thoughts
Replacing old bathroom pipes in Cabo Roig, Los Montesinos, and neighbouring towns is not the most glamorous part of a renovation, but it's one of the most important. Modern materials like PEX are reliable, affordable, and well-suited to the local water conditions, and doing the work properly now means you can enjoy your new bathroom for decades without worrying about leaks, low pressure, or corroded fittings.
The key is to plan the plumbing work as an integral part of the renovation from the start, not as an afterthought. A thorough initial survey, honest advice about what needs replacing, and skilled installation will save you money and trouble in the long run. When the tiles go back on and the new taps and shower are fitted, you'll have the confidence that everything behind the walls is as good as what you can see.
FAQ
How long does it take to replace all the pipes in a bathroom in Cabo Roig?
Replacing all supply and waste pipes in a standard bathroom (basin, toilet, shower) typically takes two to four days, including removal of old pipes, installation of new PEX or copper supply lines and PVC waste, pressure testing, and making good the walls. This is part of the overall renovation timeline, which usually runs one to three weeks for a complete bathroom refurbishment.
Do I need to replace bathroom pipes if there are no leaks?
If your pipes are galvanised steel, lead, or copper more than 25–30 years old, replacement during a renovation is strongly recommended even without visible leaks. Corrosion and limescale build-up reduce performance and increase the risk of failure. If pipes are modern PEX or recent copper in good condition, you may be able to reuse them, but a contractor can advise once the bathroom is stripped.
What type of pipe is best for bathroom renovations in this area?
Cross-linked polyethylene (PEX) or multilayer PEX-Al-PEX is now the standard for water supply in most renovations around Cabo Roig and Los Montesinos. It resists corrosion and limescale, is flexible and quick to install, and handles the local hard water well. Copper is still a good choice for exposed runs or if you prefer a traditional material. For waste, modern push-fit PVC is reliable and easy to adapt.
Will replacing pipes increase the cost of my bathroom renovation a lot?
Material costs for a full bathroom re-pipe are typically €200–€400, and the labour adds roughly 15–25% to the overall project cost. The marginal cost is lower if done during a renovation because walls and floors are already open. Replacing pipes separately later is far more expensive due to the need to strip and remake finishes again.
Do I need permission from the community of owners to replace bathroom pipes?
If the work only affects pipes within your property, you usually just need to notify the community and follow any rules about working hours. If it involves shared risers, soil stacks, or mains connections, you may need formal permission. Check your community statutes and inform the president in advance to avoid issues.