Reformas de Baños Alicante: Complete Renovation Guide
If you're planning a bathroom renovation along the Costa Blanca, you're probably weighing up materials, contractors, and what the whole process will actually look like from start to finish. Reformas de baños Alicante projects vary widely depending on the age of your property, the layout you want, and the specific challenges that come with coastal living in towns like Torrevieja, Orihuela Costa, La Zenia, Playa Flamenca, and Cabo Roig. This guide walks you through the real work sequence, the materials that hold up best in this climate, and the practical details that affect both timeline and budget.
Understanding the Work Sequence for Bathroom Renovations in Alicante
Every bathroom renovation follows a logical order, and skipping steps or rushing through phases almost always creates problems later. The sequence matters because plumbing and electrical work must be finished and tested before you lay tiles, and waterproofing must cure properly before you install fixtures.
Strip-Out and Demolition
The first day is always the noisiest. We remove the old toilet, basin, bath or shower tray, tiles, and any cabinets. If the property is an older flat in Torrevieja or Guardamar del Segura, we often find original tiles laid directly onto the slab with thick mortar beds, which takes longer to break up than modern adhesive-fixed tiles. Dust control matters: we seal doorways with plastic sheeting and open windows when possible, though in apartment blocks you need to respect community quiet hours (usually no noisy work before 08:00 or after 20:00 on weekdays, and often restricted on weekends).
Once everything is out, we inspect the substrate. In many older buildings along the coast, we find cracked render, damp patches near the base of walls, or old galvanised steel pipes that have corroded. If the floor slab is uneven or the walls are out of plumb, we note it now because it affects how much levelling compound or render we'll need.
Plumbing and Electrical Rough-In
Next comes the hidden infrastructure. We chase new channels into walls for water supply pipes (hot and cold) and waste pipes, and run electrical cables for lights, an extractor fan, and sockets if required. In coastal properties, we always use copper or PEX plastic pipes rather than any ferrous metal, because salt air accelerates corrosion even indoors when humidity is high.
Waste routing is critical in flats: the new toilet and shower waste must connect to the existing soil stack, and if you're moving the toilet position significantly, you may need to pump the waste or raise the floor locally to maintain fall. We test all joints for leaks before closing anything up. Electrical work must include an RCD (residual current device) for the bathroom circuit, and any new circuits need to be certified.
Waterproofing and Preparation
Waterproofing is non-negotiable, especially in the wet zones (shower area, around the bath, and behind the basin). We apply a flexible tanking membrane—usually a two-part liquid system—over the substrate and up the walls to at least 1.8 metres in the shower zone. Corners, pipe penetrations, and floor-wall junctions get reinforcing tape bedded into the membrane. This step takes a full day including drying time, and you cannot rush it; the membrane needs to cure fully or it won't do its job.
In older properties with solid walls, we sometimes find the original plaster is soft or blown. We hack it off and re-render with a sand-cement mix or a pre-mixed renovation plaster, then let it dry for several days before tanking. Skipping this leads to tiles debonding later.
Tiling Walls and Floors
Tiling usually starts on the walls, working from the bottom up, and then the floor. Porcelain tiles are the most popular choice for reformas de baños Alicante because they're hard-wearing, water-resistant, and available in every style from plain white to wood-effect or stone-look. We use a flexible tile adhesive (C2S1 or C2S2 classification) and match it with a flexible grout, both essential in a coastal environment where temperature and humidity swings cause slight movement.
For small bathrooms—common in older flats in Pilar de la Horadada or Los Montesinos—large-format tiles (60×60 cm or 60×120 cm) make the space feel bigger because there are fewer grout lines. Rectified edges give tight joints. On floors, we always check the fall toward the drain; it should be about 1:100 (one centimetre per metre) so water doesn't pool.
Grout colour matters more than people think: light grout shows limescale staining quickly in hard-water areas, so mid-grey or beige is more forgiving. We seal grout lines in showers with a penetrating sealer once the grout has cured, which takes about three days.
Fitting Fixtures and Final Finishes
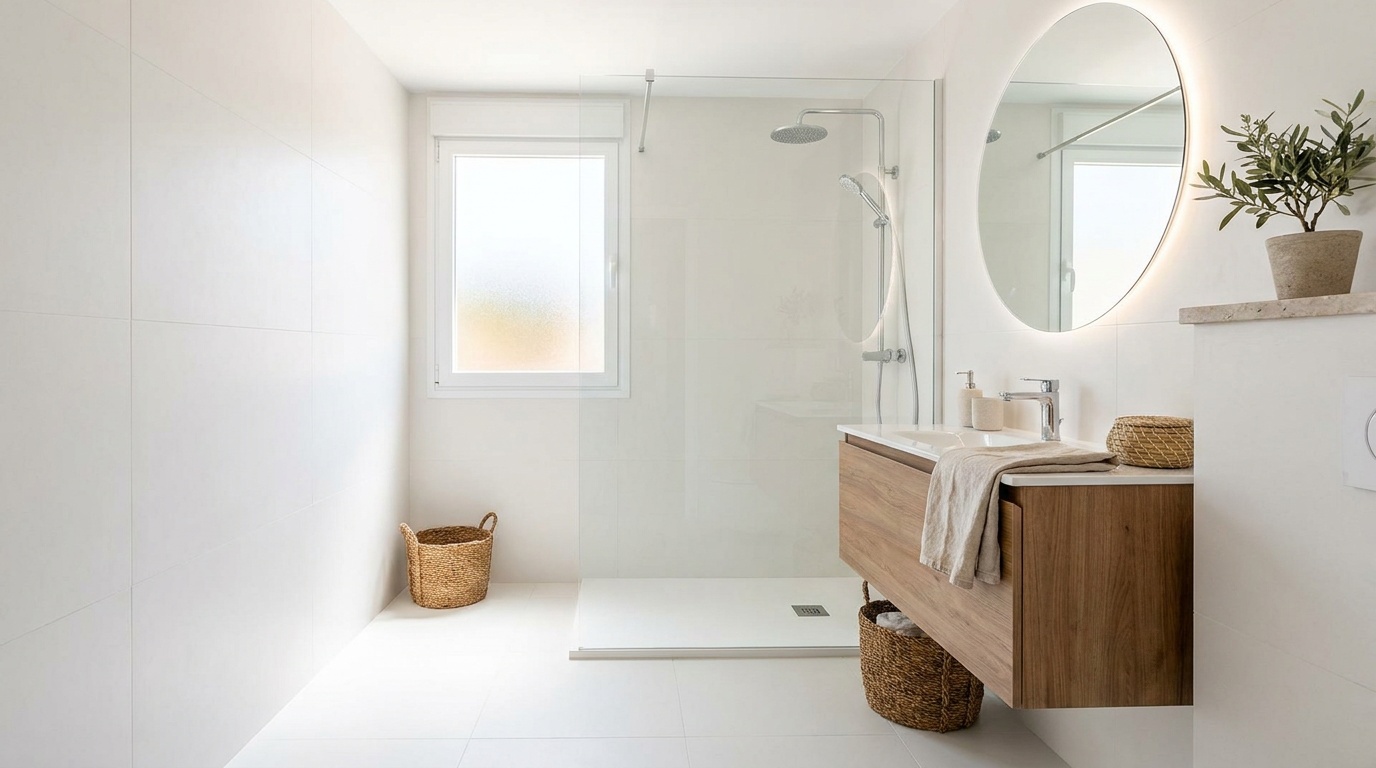
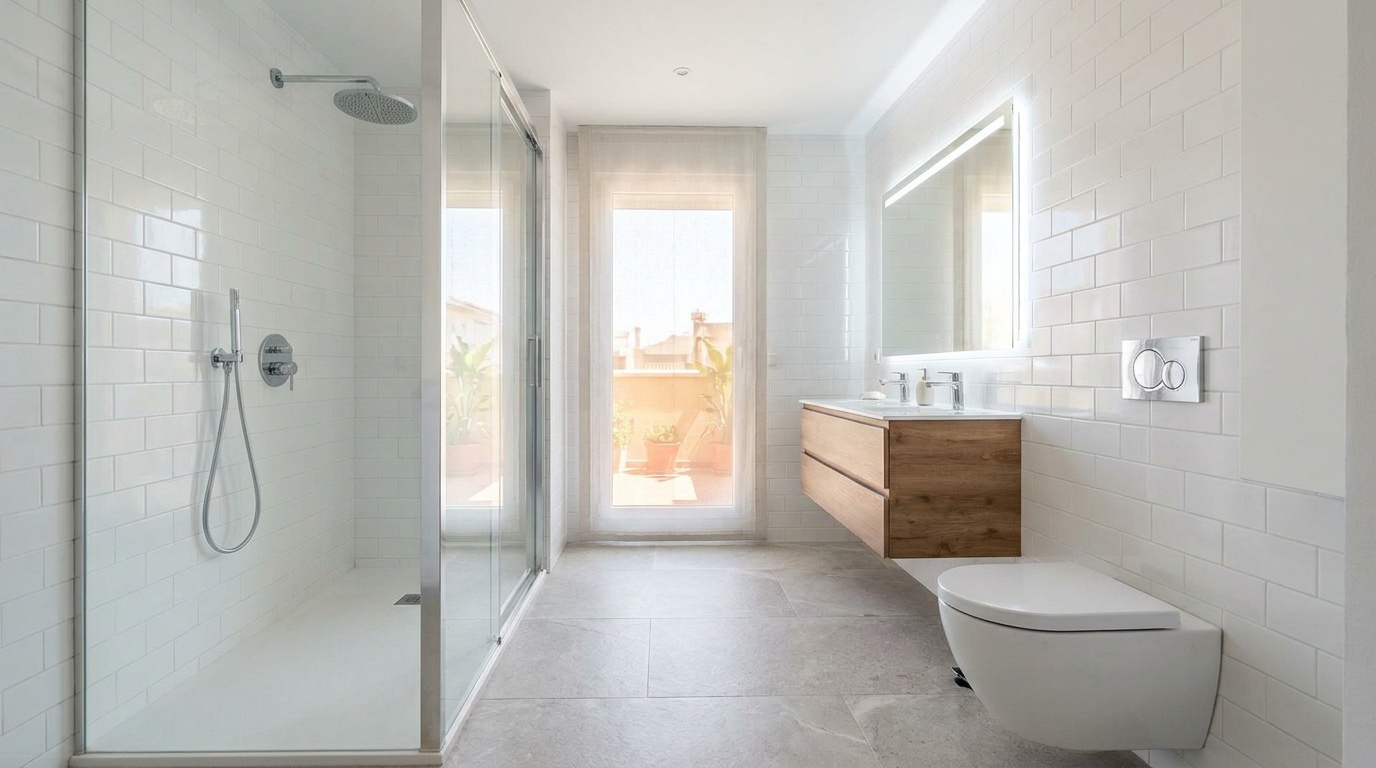
Once tiling is complete and grout has hardened, we fit the sanitaryware: toilet (wall-hung or close-coupled), basin (on a vanity unit or wall-mounted), and shower tray or tiled wet-room former. Walk-in showers with a low-profile acrylic or resin tray and a fixed glass screen are now standard in most renovations; they look clean, are easy to maintain, and suit limited mobility better than a bath.
Taps and mixers should be solid brass with ceramic cartridges—cheap chrome-plated zinc alloy fittings corrode quickly in coastal humidity. Thermostatic shower mixers are worth the extra cost because they prevent scalding and maintain steady temperature even when someone flushes a toilet elsewhere in the property.
We fit an extractor fan vented to the outside (or a humidity-sensing model if there's no external wall), install mirrors, towel rails, and any shelving or cabinets, then apply silicone sealant around the edges of the tray, basin, and toilet base. The final step is a thorough clean to remove grout haze, adhesive smears, and dust.
Materials That Work Best in Coastal Alicante Properties
Choosing the right materials isn't just about looks; it's about how they perform in an environment with high humidity, hard water, and salt-laden air.
Porcelain Tiles vs. Ceramic Tiles
Porcelain is denser and less porous than standard ceramic, so it absorbs almost no water and resists staining better. For floors and shower walls, porcelain is the better choice. Ceramic tiles are fine for dry wall areas and are slightly cheaper, but the performance difference justifies porcelain in wet zones.
Textured or anti-slip finishes are essential on floors, especially in a shower. A slip-resistance rating of R10 or higher (or class B or C in the DIN 51097 standard) reduces the risk of falls when the floor is wet.
Microcement and Resin Finishes
Microcement has become popular for a seamless, contemporary look. It's a trowel-applied cementitious coating that goes over the existing substrate (tiles, render, or board) and, when sealed properly, is waterproof and very durable. It works well for walls and floors, and you can use it inside a shower if the installer is experienced. The downside: it's more expensive than tiling (material and labour combined), and any cracking in the substrate can telegraph through. In older buildings with movement, tiles are more forgiving.
Shower Trays and Screens
Acrylic and resin-stone composite trays (brands like Acquabella or similar) are lighter than ceramic trays, easier to cut to size, and available in many colours. A tray with a low profile (four to six centimetres) looks modern and is easier to step into. We bed the tray on a full mortar screed so it doesn't flex, and seal the waste connection carefully.
Glass screens should be at least 6 mm toughened safety glass, ideally with an anti-limescale coating (sometimes called "easy-clean" or nano-coating). In hard-water areas like Torrevieja and Rojales, this coating makes a noticeable difference; without it, you'll be scrubbing white deposits off the glass every week.
Taps, Mixers, and Fittings
Brass body, ceramic cartridge, chrome or brushed-nickel finish: that's the baseline for quality. Avoid plastic-bodied mixers or those with rubber washers, which fail quickly. Thermostatic mixers for showers are safer and more comfortable than manual mixers. For basins, a single-lever mixer is easier to use than separate hot and cold taps, and a pop-up waste is more hygienic than a traditional plug and chain.
Timelines: How Long Does a Bathroom Renovation Take?
A typical full bathroom renovation—strip-out, new plumbing and electrics, tiling, and fitting—takes between ten and fifteen working days for a standard-sized bathroom (around five to six square metres). This assumes no major surprises and reasonable access.
Day 1–2: Strip-out, waste removal, substrate inspection and repair. Day 3–4: Plumbing and electrical rough-in, first-fix inspection. Day 5: Waterproofing (tanking), drying time. Day 6–9: Wall and floor tiling, grouting, grout curing. Day 10–12: Fit sanitaryware, shower screen, taps, accessories. Day 13: Silicone sealing, final adjustments. Day 14–15: Clean, snag, handover.
In practice, you should allow an extra few days for drying times, material deliveries, and coordination if you're in an apartment block where the contractor can't work full days due to community rules. If you're changing the bathroom layout significantly—moving the toilet or adding a second shower—it can add three to five days. Structural issues (rotten joists, major leaks, asbestos removal in very old buildings) can extend the timeline considerably.
Free visit and quote, fixed price in writing and a guarantee on the works.
What Affects the Price of Bathroom Renovations in Alicante?
Pricing varies, but understanding the main cost drivers helps you budget realistically and compare quotes.
Size and Layout Complexity
A small ensuite (three to four square metres) costs less than a family bathroom (six to eight square metres) simply because there's less area to tile and fewer materials. If you're keeping the toilet, basin, and shower in their original positions, you save on plumbing modifications. Moving a toilet across the room or adding a second basin means more pipework, more labour, and possibly raising the floor or installing a macerator pump.
Material Choices
Budget porcelain tiles start around €15–25 per square metre; mid-range designer tiles or large-format rectified porcelain can be €40–70 per square metre or more. Microcement costs more than tiling—both material and specialist labour. Sanitaryware ranges from basic white suites (€300–500 for toilet, basin, and shower tray) to designer brands (€1,500–3,000 or higher). Thermostatic mixers, rainfall showerheads, and concealed cisterns all add to the bill.
Plumbing and Electrical Work
If the existing pipes and cables are sound and you're not moving fixtures, the cost is lower. Replacing all pipework, adding new circuits, or dealing with corroded old steel pipes increases labour time. In older buildings, we sometimes need to run new supply pipes from the main stopcock or upgrade the electrical consumer unit if it's an old fuse board without RCD protection.
Access and Building Type
Ground-floor properties with direct street access are simpler: we can park a van nearby and carry materials and waste in and out easily. Upper-floor flats without a lift mean more time and effort hauling bags of rubble down stairs, which adds to labour costs. Gated communities or urbanisations with restricted access hours or parking can slow the job down.
Waste Removal
Disposal of construction waste (rubble, old tiles, broken sanitaryware) isn't free. We hire skips or use a licensed waste carrier, and the cost depends on volume. A full bathroom strip-out typically generates one to two cubic metres of waste.
Unexpected Issues
Hidden problems—damp, rotten timber, leaking pipes, asbestos in very old properties—add cost. A pre-renovation survey helps, but you can't always see what's behind tiles until they're off. Setting aside a contingency of 10–15% of the total budget is sensible.
Typical Local Challenges and How to Manage Them
Every region has its quirks. In Torrevieja, Orihuela Costa, La Zenia, Playa Flamenca, Cabo Roig, and nearby towns, certain issues come up again and again.
Hard Water and Limescale
Water in much of the Costa Blanca is very hard—high in calcium and magnesium. Limescale builds up quickly on taps, shower screens, and inside pipework. We recommend:
- Anti-limescale coatings on glass screens.
- Thermostatic mixers with removable cartridges so you can descale or replace them without changing the whole unit.
- Regular cleaning with a mild acidic cleaner (white vinegar works) rather than letting deposits harden.
- Water softeners or scale inhibitors on the supply line if limescale is severe, though this is an extra cost.
Humidity and Poor Ventilation in Older Flats
Many older apartments have small bathrooms with no window, just a passive vent or no ventilation at all. Without an extractor fan, humidity stays high, encouraging mould on grout, sealant, and painted surfaces. We always fit a mechanical extractor vented to the outside or, if that's not possible, a high-quality humidity-sensing fan that runs automatically. In some cases, we core-drill through an external wall to install the vent duct.
Anti-mould silicone sealant and grout additives help, but they're not a substitute for proper ventilation.
Coastal Climate and Corrosion
Salt air accelerates corrosion of metal fittings, hinges, and fixings. We use stainless steel screws and brackets wherever possible, and avoid cheap chrome-plated mild steel. Extractor fan grilles and towel rail fixings should be plastic or stainless. Even with good materials, regular maintenance—wiping down chrome, checking sealant—extends the life of the installation.
Old Pipes in Older Buildings
Properties built in the 1970s and 1980s often have galvanised steel water pipes, which corrode from the inside out. Low water pressure, brown or rusty water when you first turn on a tap, and pinhole leaks are all signs. If we find old steel pipes during strip-out, we recommend replacing at least the bathroom section with copper or PEX. It's extra work, but it prevents future leaks and water damage.
Community of Owners Rules
If you live in an apartment block or urbanisation with a community of owners (comunidad de propietarios), you may need to notify them before starting work, especially if it involves structural changes, altering façades, or drilling through external walls for ventilation. Some communities require you to submit plans or get written approval. Noisy work is typically restricted to weekday daytime hours. Check your community statutes and inform the president or administrator before you start.
Permits and Paperwork: What You Need to Know
Regulations vary by town hall (ayuntamiento), so always confirm the current rules with your local authority or your contractor. In general:
- Minor works (obra menor): Most bathroom renovations that don't alter structure or façade fall into this category. You may need to submit a declaración responsable or request a licencia de obra menor. Some town halls process these quickly (a few days); others take weeks. Fees vary.
- No permit for like-for-like: In some municipalities, if you're simply replacing tiles, sanitaryware, and fittings without moving walls or plumbing routes, no permit is required. However, this is not universal—check locally.
- VAT: Standard VAT on construction work in Spain is currently 21%, but reduced rates (10%) can apply to renovations of residential properties under certain conditions (age of property, type of work). Confirm with your contractor and, if necessary, a gestor or accountant.
Companies like Reformas Baño Alicante often handle the permit process as part of the service, which saves you navigating town hall bureaucracy in Spanish.
Preparing Your Home and Living Through the Renovation
A bathroom renovation is disruptive, but planning ahead makes it much easier.
Before Work Starts
- Clear the bathroom completely: Remove toiletries, towels, cabinets, mirrors, and anything else. The contractor will take care of the fixtures, but personal items are your responsibility.
- Arrange alternative facilities: If it's your only bathroom, plan where you'll shower and use the toilet. Family or neighbours, a local gym, or a temporary chemical toilet are options. Some clients in larger properties convert a small ensuite or downstairs WC temporarily.
- Protect adjacent rooms: Dust will escape despite precautions. Cover furniture in nearby rooms or close doors and seal gaps with tape.
- Notify neighbours: In apartment blocks, a courtesy note or conversation explaining the work dates and hours helps avoid complaints.
During the Work
- Expect noise and mess: Demolition, drilling, and tile-cutting are loud and dusty. Contractors will clean up at the end of each day, but dust settles everywhere.
- Be available for decisions: Occasionally, an unexpected issue needs a quick decision (for example, if we find a leak or need to reroute a pipe). Being reachable by phone speeds things up.
- Check progress: Visit the site daily if possible, or ask for photos. It's easier to adjust something mid-job than after it's finished.
After Completion
- Allow sealant and grout to cure: Don't use the shower for at least 24 hours after final sealing (48 hours is better). Grout takes several days to reach full strength.
- Ventilate well: Run the extractor fan and open windows to clear any lingering solvent or adhesive smells.
- Ask for care instructions: Your contractor should explain how to clean and maintain the materials—what products to use, what to avoid.
Common Mistakes and How to Avoid Them
Over the years, I've seen the same mistakes repeated. Here's how to sidestep them.
Choosing the Cheapest Quote Without Checking Details
A very low quote often means corners will be cut—poor-quality materials, no waterproofing, or subcontracted labour with no supervision. Compare quotes carefully: check what's included (materials, labour, waste removal, permits), ask about the materials specified (brand and grade of tiles, type of tanking membrane, quality of taps), and request references or photos of previous work.
A fixed-price quote after a site visit (which Reformas Baño Alicante and other reputable firms offer) is more reliable than an estimate over the phone.
Skimping on Waterproofing
Waterproofing is invisible once the tiles go on, so it's tempting to skip it or use a cheap product. Don't. Water ingress causes structural damage, mould, and expensive repairs. Insist on a proper tanking system and check it's been applied before tiling starts.
Ignoring Ventilation
A bathroom without adequate ventilation will develop mould, peel paint, and smell damp, no matter how good the tiles and fittings are. Fit a properly sized extractor fan and make sure it vents outside, not into a roof space or cavity.
Poor Tile Layout and Planning
Tiles should be laid symmetrically, with cuts hidden in corners or behind the door. A good tiler will dry-lay tiles first to plan the layout and avoid narrow slivers at edges. Large-format tiles need careful levelling; lippage (where one tile edge is higher than the next) looks terrible and is hard to fix once the adhesive has set.
Not Planning for Storage
Bathrooms generate clutter—toiletries, towels, cleaning products. Built-in niches in the shower, a vanity unit with drawers, or a wall-mounted cabinet keep things tidy. Plan storage into the design rather than adding freestanding units later.
Why Local Expertise Matters for Reformas de Baños Alicante
Bathroom renovation isn't one-size-fits-all. A contractor who knows the local building stock, climate, and suppliers can anticipate problems and source materials quickly. In Torrevieja, Orihuela Costa, La Zenia, Playa Flamenca, Cabo Roig, and nearby towns, properties range from 1970s Spanish apartment blocks to modern villas, each with different construction methods and challenges.
Local firms understand community rules, know which town halls require permits for what, and have relationships with tile suppliers and plumbers' merchants in Alicante, Torrevieja, and Elche. They can get materials delivered quickly and at trade prices, and they're accountable—if something goes wrong, they're nearby to fix it.
When you're comparing contractors, ask where they're based, how long they've worked in the area, and whether they can show you completed projects locally that you can visit. A free site visit and fixed quote—standard practice for established local companies—gives you certainty before you commit.
Final Checklist: Planning Your Bathroom Renovation
Use this checklist to keep your project on track:
Design and Planning:
- Measure the space and sketch a layout (or have the contractor do it).
- Decide on the style: modern, traditional, minimalist, etc.
- Choose sanitaryware: toilet, basin, shower or bath, taps, and mixers.
- Select tiles: porcelain or ceramic, size, colour, finish.
- Plan lighting: ceiling light, mirror light, downlights.
- Plan storage: vanity unit, niches, shelves, cabinets.
Contractor and Quotes:
- Get at least three quotes from local, established contractors.
- Check each quote covers materials, labour, waste removal, and permits.
- Ask for references and photos of recent work.
- Confirm the timeline and payment schedule.
Permits and Compliance:
- Check with your town hall or ask your contractor about permit requirements.
- Notify your community of owners if you live in an apartment block.
- Ensure electrical work will be certified and compliant.
Preparation:
- Clear the bathroom and protect adjacent rooms.
- Arrange alternative toilet and shower facilities.
- Notify neighbours about the work schedule.
During the Work:
- Check progress regularly.
- Be available for decisions if unexpected issues arise.
- Keep communication open with the contractor.
After Completion:
- Inspect the work: check tiling, grouting, sealant, fittings.
- Test everything: taps, shower, toilet flush, drainage, lights, extractor.
- Ask for care and maintenance instructions.
- Keep any warranties or guarantees for materials and labour.
A well-planned bathroom renovation adds comfort, value, and style to your home. With the right materials, a skilled contractor, and realistic expectations, the process is manageable and the results are worth it.
FAQ
How long does a bathroom renovation take in Torrevieja or Orihuela Costa?
A typical full bathroom renovation takes ten to fifteen working days for a standard-sized bathroom, including strip-out, plumbing, tiling, and fitting. Allow extra time for drying (waterproofing, grout) and any unexpected issues like old pipework or damp. In apartment blocks with restricted working hours, the timeline may extend slightly.
Do I need a permit to renovate a bathroom in Alicante province?
It depends on the scope of work and your local town hall. Most bathroom renovations are classed as minor works (obra menor) and may require a declaración responsable or licencia de obra menor. Simple like-for-like replacements sometimes need no permit, but rules vary by municipality—always check with your ayuntamiento or ask your contractor to confirm.
What are the best tiles for a bathroom in a coastal area like La Zenia or Cabo Roig?
Porcelain tiles are the best choice for coastal bathrooms because they're dense, water-resistant, and durable. Choose a textured or anti-slip finish (R10 or higher) for floors and shower areas. Porcelain handles humidity and temperature changes better than standard ceramic, and it resists staining from hard water and salt air.
How can I prevent limescale buildup in my bathroom in Torrevieja?
Use shower screens with anti-limescale coating, fit quality thermostatic mixers with removable cartridges, and clean regularly with a mild acidic cleaner like white vinegar. For severe hard water, consider a water softener or scale inhibitor on the supply line. Proper ventilation also helps by reducing humidity and slowing mineral deposit formation.
What should I look for when choosing a bathroom renovation contractor in Alicante?
Choose a local, established contractor with experience in coastal properties. Ask for references and photos of recent work, check that quotes are detailed and fixed-price after a site visit, and confirm they handle permits and waste removal. A reputable contractor will explain materials, timelines, and any potential issues honestly, and be easy to contact throughout the project.