Bathroom Renovation Holiday Home Guardamar: Complete Guide
Introduction
Owning a holiday home in Guardamar del Segura means enjoying the Costa Blanca lifestyle, but it also means maintaining a property from hundreds or thousands of kilometres away. A bathroom renovation holiday home Guardamar project presents unique challenges: coordinating trades remotely, ensuring quality without being on-site daily, and navigating local suppliers and regulations from another country. This guide walks you through the entire process, from initial planning to final handover, with practical advice drawn from years of renovating bathrooms in coastal properties across Guardamar, Torrevieja, Orihuela Costa and neighbouring towns.
Why Holiday Home Bathrooms Need Special Attention
Bathrooms in holiday homes age differently than in permanent residences. They sit empty for months, then see intensive use during peak season. This cycle accelerates certain problems.
Humidity and Ventilation in Empty Properties
When a property stands empty, windows stay closed. Residual moisture from the last shower or from humid sea air trapped inside creates perfect conditions for mould, especially in older flats with single-glazed windows and no mechanical ventilation. Black spots appear on silicone joints, grout and painted ceilings. Once mould takes hold, surface cleaning rarely solves the problem—you need proper ventilation and mould-resistant materials.
In Guardamar, many older apartment blocks near the beach were built in the 1980s and 1990s without extractor fans or adequate air bricks. During renovation, installing a good-quality extractor (at least 100 m³/h for a standard bathroom) and replacing absorbent materials with waterproof alternatives makes a measurable difference.
Hard Water and Limescale Build-Up
Coastal groundwater in this area is notoriously hard. Limescale coats taps, showerheads, screens and tiles. In a holiday home where taps drip unnoticed for weeks, the build-up becomes stubborn white crust that etches chrome and glass. Older mixer taps and thermostatic valves seize up entirely.
During renovation, consider fitting a small inline water softener or at minimum choose taps and shower fittings with anti-limescale cartridges. Large-format porcelain tiles with rectified edges and minimal grout also reduce limescale traps compared to small mosaics.
Ageing Plumbing in Older Buildings
Many properties in Guardamar still have original galvanised steel or early plastic pipes. Corrosion narrows the bore, pressure drops, and leaks develop behind tiles. When you open walls during a bathroom renovation, discovering rusty pipes or cracked solder joints is common. Replacing visible sections without addressing hidden pipework stores up problems for next season.
A thorough renovation includes replacing all bathroom supply and waste pipes back to the main risers. Use modern multilayer pipe (PEX-AL-PEX) for hot and cold water—it resists corrosion, handles high temperatures and installs faster than copper. For waste, 40 mm and 50 mm PVC with proper falls prevents blockages.
Planning Your Holiday Home Bathroom Renovation from Abroad
Successful remote renovation starts months before the first tile comes off. You need a clear plan, reliable local contacts and realistic expectations about what you can and cannot control from a distance.
Setting a Realistic Budget and Timeline
A basic bathroom renovation in Guardamar—removing old fittings, retiling walls and floor, fitting a new shower tray, screen, toilet, basin and taps—typically takes two to three weeks once work begins. Budget ranges vary widely: a small ensuite with mid-range materials might come in around €3,000–€4,500, while a larger family bathroom with premium finishes, underfloor heating and custom carpentry can reach €8,000–€12,000 or more. These are rough guides; final cost depends on layout changes, hidden problems (rotten joists, asbestos removal in very old buildings) and material choices.
Add a contingency of 15–20 per cent for unexpected issues. In older Guardamar properties, opening walls often reveals damp damage, outdated wiring that needs upgrading to current standards, or structural cracks that need repair before tiling.
Timeline-wise, allow extra days for material delivery. Coastal suppliers sometimes run low on popular tiles or sanitaryware during peak building season (spring and early summer). If you order a specific tap or vanity unit from a catalogue, delivery can take two to four weeks.
Choosing the Right Time of Year
Autumn (October–November) and early spring (February–March) are ideal. The property is usually empty, weather is mild (important for drying times and ventilation), and local contractors have more availability than in summer when everyone wants work done before holiday season.
Avoid July and August if possible. Temperatures inside an unventilated bathroom can exceed 35°C, slowing adhesive and grout curing. Contractors also take holidays, and material suppliers operate reduced hours.
Selecting Materials Before You Arrive
If you live abroad, visiting tile showrooms in person is impractical. Many owners try to choose everything online, but screen colours rarely match reality, and you cannot feel the texture or judge slip resistance.
A better approach: create a shortlist online (Pinterest boards, manufacturer websites), then ask your contractor to collect samples. Companies like Reformas Baño Alicante offer a free initial visit where they bring sample boards showing tile options, tap finishes and typical layouts. You receive photos and videos of samples in your actual bathroom lighting, which helps enormously.
For a coastal holiday home, prioritise:
- Porcelain tiles (30×60 cm or 60×60 cm) over ceramic for floors and walls. Porcelain is denser, less porous, resists staining and handles temperature swings better.
- Rectified edges for tiles, allowing 1–2 mm grout lines instead of 3–5 mm. Less grout means less maintenance and fewer limescale traps.
- Large-format tiles where possible. A 5 m² bathroom floor in 60×60 cm tiles needs far fewer grout lines than the same area in 20×20 cm tiles.
- Epoxy grout for wet areas (shower, around the bath). It costs more than standard cementitious grout but resists mould, staining and limescale, and stays cleaner with minimal effort.
- Thermostatic shower valves with anti-scald protection. Safer for rental guests and maintains temperature even when water pressure fluctuates (common in older buildings).
- Frameless or minimal-frame glass shower screens. Easier to clean than shower curtains or framed enclosures, and they make small bathrooms feel larger.
Free visit and quote, fixed price in writing and a guarantee on the works.
Managing the Renovation Remotely
You cannot be on-site daily, so you need systems that keep you informed without micromanaging every detail.
Finding a Trustworthy Local Contractor
Word-of-mouth from other expat homeowners in Guardamar is invaluable. Ask in local Facebook groups (Guardamar Residents, Costa Blanca Expats) or the community of owners (comunidad) if your building has an active committee. Look for contractors who:
- Provide a detailed written quote (presupuesto) breaking down labour, materials, waste removal and VAT separately. Vague one-line quotes lead to disputes.
- Offer a fixed price for the agreed scope. Hourly rates make sense for small repairs but not whole-bathroom renovations.
- Show photos of recent similar projects in the area, ideally in buildings you recognise.
- Speak your language or have reliable translation. Misunderstandings about finishes or layout cause expensive mistakes.
Reformas Baño Alicante, for example, provides a free no-obligation visit and fixed quote, which many holiday-home owners find reassuring when planning from abroad.
Establishing Clear Communication Channels
Agree upfront how often you will receive updates and in what format. Daily WhatsApp photos work well: a quick snap each evening showing progress, with a voice note explaining what was done and what is planned for tomorrow. Video calls once or twice a week let you see details and ask questions in real time.
Create a shared cloud folder (Google Drive, Dropbox) for all documents: quote, material invoices, permits if needed, and progress photos organised by date. This avoids hunting through message threads later.
Appointing a Local Representative
If possible, nominate a trusted friend, neighbour or property manager in Guardamar who can visit the site once or twice during the project. They can check quality, confirm materials match what you ordered, and handle small decisions (exact placement of a towel rail, shade of grout) without international phone calls.
Some owners use their estate agent or a paid property management service. Expect to pay €100–€200 for this service if it is not included in an existing management contract.
Handling Keys and Access
Contractors need reliable access, especially if work spans several weeks. Options:
- Leave a key with the contractor (only if you have strong references and trust).
- Use a key safe (caja de llaves) mounted discreetly near your door; share the code only for the renovation period, then change it.
- Arrange for a neighbour or property manager to open up each morning and lock up each evening. This adds oversight but requires coordination.
In apartment blocks, inform the community president and neighbours in writing about the planned work, expected noise and hours. Most communities allow noisy work Monday–Friday 08:00–14:00 and 16:00–20:00, with restrictions at weekends. Ignoring this can result in complaints and fines.
Typical Bathroom Layouts and Design Choices for Holiday Homes
Holiday homes in Guardamar range from compact one-bedroom apartments (bathroom around 3–4 m²) to larger villas with multiple bathrooms. Layout and material choices should balance aesthetics, durability and ease of maintenance.
Small Bathroom Layouts (3–5 m²)
Most older apartments have a single bathroom: toilet, basin, bath or shower, often in a narrow rectangular room. Common layout challenges:
- Door opening inward wastes space. If the community allows (you may need permission to change door swing direction in shared buildings), rehang the door to open outward into the hallway, or fit a sliding pocket door.
- Bathtub taking up one wall. Replacing a 1.7 m bath with a 1.2 m walk-in shower frees up space for a larger vanity unit or washing machine.
- Pedestal basin with no storage. A wall-hung vanity unit (60–80 cm wide) provides storage and makes floor cleaning easier.
For a typical 3 m × 1.5 m bathroom, a practical layout:
- Walk-in shower (1.2 m × 0.8 m) with a low-profile acrylic or resin tray at one end, glass screen to prevent splashing.
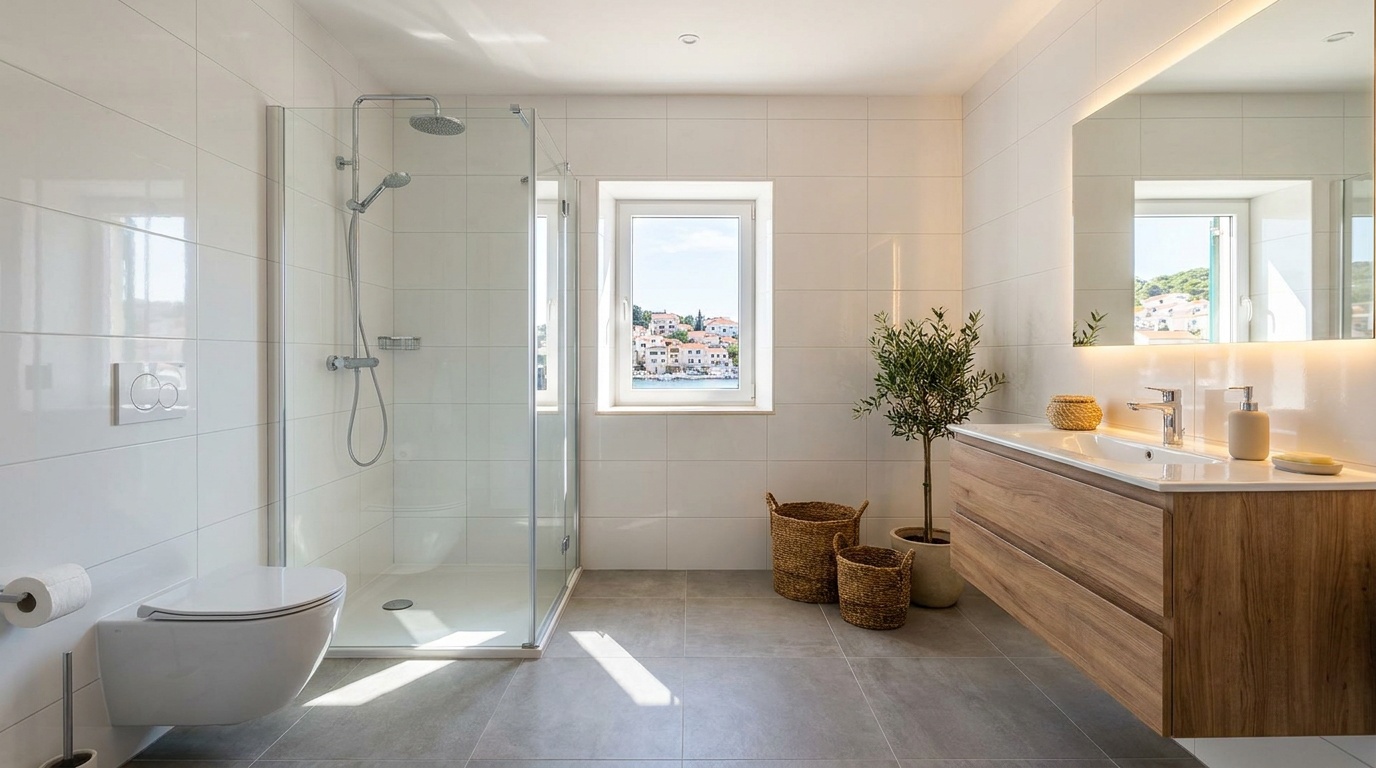
- Wall-hung toilet opposite the shower, with the cistern concealed in a half-height tiled boxing. This raises the toilet slightly, making it easier to clean underneath.
- Vanity unit (80 cm) with integrated basin next to the toilet.
- Mirror cabinet above the vanity for storage.
- Extractor fan ducted to an external wall or into a ventilation shaft if available.
Use large light-coloured tiles (30×60 cm or larger) on walls and floor to make the space feel bigger. A single tile type for both walls and floor simplifies the design and reduces visual clutter.
Ensuite and Guest Bathrooms
If your holiday home has an ensuite, consider a wet-room style: tanked floor and walls, floor drain, no shower tray. The entire floor slopes gently (1–2 per cent gradient) toward the drain. This works well in small ensuites (2–3 m²) where a separate shower enclosure feels cramped.
Wet rooms require skilled tanking (waterproof membrane under the tiles) and precise floor screeding. Done properly, they are easy to clean and look seamless. Done poorly, water escapes under partitions or pools in corners. Only use an experienced contractor for wet-room installations.
Material Choices for Low Maintenance
Holiday homes need finishes that stay clean with minimal effort and tolerate months of neglect:
- Microcement or large porcelain slabs for walls instead of small tiles. Microcement is a trowel-applied waterproof coating (2–3 mm thick) with no grout lines at all. It costs more than tiles but delivers a seamless modern look and wipes clean instantly.
- Matt or satin tile finishes rather than high gloss. Gloss shows every water spot and limescale mark; matt finishes are more forgiving.
- Chrome or brushed steel taps over painted or gold-effect finishes. Chrome resists corrosion in humid coastal air and polishes up easily.
- Floating vanity units rather than floor-standing. They make the room feel larger and cleaning the floor takes seconds.
- LED mirror with integrated lighting instead of separate wall lights. Fewer fixtures, less maintenance, and modern LED strips last years.
Permits, Community Rules and Legal Considerations
Bathroom renovation usually qualifies as obra menor (minor works) in Spain, requiring a declaration of responsibility (declaración responsable) or minor works licence (licencia de obra menor) from Guardamar del Segura town hall. The exact requirement depends on the scope: if you are only replacing fittings and tiles without moving walls or plumbing routes, some town halls consider it exempt. If you are relocating the toilet, adding a new window or altering the building's exterior (for example, a new extractor vent through the façade), you likely need a permit.
Always confirm current permit rules with Guardamar town hall or your contractor before starting work. Requirements change, and fines for unpermitted work can reach several thousand euros, plus you may be ordered to reverse the changes.
Processing a declaración responsable typically takes a few days and costs €100–€300 including architect or aparejador fees if required. Your contractor may handle this as part of the service; ask upfront.
Community of Owners Approval
In apartment blocks, the community statutes (estatutos) may require written permission from the president or administrator before starting renovation work, even inside your own property. This is especially true if:
- Work affects shared services (water risers, waste stacks, ventilation ducts).
- You plan to install a new extractor vent through an external wall (changes the building's appearance).
- Noise or access affects neighbours (contractors using lifts, skips in communal areas).
Submit a brief written request (registro de entrada) describing the work, expected duration and contractor details. Most communities approve routine bathroom renovations without issue, but skipping this step can lead to complaints and demands to halt work.
VAT and Tax Deductions
Renovation work in Spain currently attracts 10 per cent VAT (IVA reducido) if it is on a residential property more than two years old and does not increase the floor area. New-build or extension work is taxed at 21 per cent. Confirm the applicable VAT rate with your contractor or accountant, as rates and conditions can change.
If you rent out your holiday home, renovation costs may be tax-deductible against rental income. Keep all invoices (facturas) and pay by bank transfer, not cash, to satisfy tax authority requirements. Consult a Spanish tax advisor (asesor fiscal) for specific advice.
Step-by-Step: What Happens During the Renovation
Understanding the work sequence helps you follow progress remotely and spot potential problems early.
Week One: Demolition and First Fix
Days 1–2: The contractor strips out the old bathroom: remove sanitaryware, tiles, boxing, any old cabinets. This is noisy, dusty work. In older buildings, be prepared for unpleasant discoveries—rotten floorboards, cracked waste pipes, evidence of previous leaks.
All waste goes into a skip or rubble sacks. Disposal (escombros) is included in most quotes but check. Fly-tipping is illegal and the property owner is liable if waste is dumped improperly.
Days 3–4: The plumber (fontanero) installs new supply pipes and waste runs. If underfloor heating is planned, the electrician lays heating mat or cable now. Any structural repairs (crack stitching, damp-proof membrane) happen at this stage.
Walls and floor are checked for level. In older buildings, floors often slope or walls are out of plumb. The tiler may need to apply a levelling compound (autonivelante) to the floor or build out walls slightly with adhesive or plasterboard.
Day 5: The electrician (electricista) runs new cables for lights, extractor fan, shaver socket, heated towel rail if specified. Cables are chased into walls or run in conduit. The extractor duct is fitted and vented to outside or into a communal duct.
Week Two: Tiling and Second Fix
Days 6–9: Tiling begins. Walls first, then floor. A good tiler works methodically: sets out tiles to avoid narrow cuts in visible corners, uses tile spacers for consistent grout lines, checks level constantly.
Adhesive needs 24 hours to cure before grouting. In hot weather, tiles may be ready to grout the next day; in cooler or humid conditions, wait longer. Rushing this causes tiles to move or grout to crack.
Days 10–11: Grouting and cleaning. Epoxy grout is mixed in small batches and worked into joints with a rubber float. Excess is wiped off immediately with a damp sponge—epoxy sets hard and is nearly impossible to remove once cured. Silicone sealant is applied around the shower tray, basin and any wall junctions.
Week Three: Fitting and Finishing
Days 12–14: The plumber returns to fit sanitaryware: toilet, basin, taps, shower valve, showerhead, shower screen. Everything is connected and tested for leaks. The electrician fits lights, extractor, mirror, shaver socket and tests all circuits.
The carpenter (if involved) installs the vanity unit, mirror cabinet, shelves, towel rails. Final touches: touch up any paint, fit the toilet seat, install accessories (toilet roll holder, soap dish, hooks).
Day 15: Final clean. The contractor removes dust sheets, cleans tiles, polishes chrome, vacuums and mops. You (or your representative) inspect the work, test everything (taps, shower, toilet flush, extractor, lights), and compile a snagging list if needed. Minor issues (a grout smear, a loose towel rail) are fixed on the spot or within a few days.
Common Problems and How to Avoid Them
Years of renovating bathrooms in coastal properties reveal recurring issues. Most are preventable with foresight.
Poor Waterproofing Leading to Leaks
Waterproofing (impermeabilización) is invisible once tiles go on, so it is often skipped or done carelessly. In a shower area, the substrate must be tanked with a waterproof membrane (liquid or sheet) before tiling. This is standard practice, but some contractors cut corners.
How to avoid: Specify tanking in the quote and ask for photos showing the membrane applied and dried before tiling starts. A proper tanking job uses a flexible polyurethane or acrylic membrane, applied in two coats, with reinforcement tape at corners and pipe penetrations.
Inadequate Ventilation Causing Mould Return
Fitting an extractor fan is not enough if it is underpowered or poorly ducted. A 60 m³/h fan in a 5 m² bathroom barely shifts the air. Flexible ducting with multiple bends restricts airflow further.
How to avoid: Specify a fan rated for at least 100 m³/h (or 15 air changes per hour for the room volume). Use rigid ducting where possible, with a maximum of one 90° bend. Fit a humidistat model that runs automatically when humidity rises, so it operates even when the property is empty.
Wrong Tile Adhesive or Grout for Wet Areas
Standard cement-based adhesive and grout are porous. In a shower, water penetrates, and mould grows behind tiles or grout discolours and crumbles.
How to avoid: Use flexible, waterproof tile adhesive (C2S1 or better) for wet areas. For grout, specify epoxy in the shower and around the bath; standard cementitious grout is acceptable elsewhere but should be sealed.
Ignoring Water Pressure and Flow Rate
Coastal apartment blocks often have low or variable water pressure, especially on upper floors. Installing a large rain showerhead or a multi-jet shower panel without checking pressure results in a disappointing trickle.
How to avoid: Test water pressure before choosing shower fittings. A simple gauge costs a few euros. Pressure below 2 bar may require a shower pump (bomba de agua) or choosing a thermostatic valve designed for low pressure.
No Allowance for Drying Time
Adhesive, grout, silicone, paint—all need time to cure properly. Contractors under time pressure sometimes rush, leading to cracked grout, failed silicone seals or tiles that sound hollow when tapped.
How to avoid: Build realistic timelines into your plan. A two-week renovation in summer heat may work, but in winter or humid autumn weather, add a few extra days. Do not allow the contractor to hand over the bathroom and leave the same day; schedule a final inspection 24–48 hours later when everything has cured.
Preparing Your Holiday Home and Handing Over
Before the contractor arrives, prepare the property to minimise delays and protect your belongings.
Pre-Renovation Checklist
- Clear the bathroom completely: Remove toiletries, towels, cabinets, mirrors, anything not fixed to the walls.
- Protect adjacent rooms: Dust and noise travel. Close doors, seal gaps with tape, cover furniture in nearby rooms with dust sheets.
- Ensure water and electricity are on: Contractors need both. If your property has been empty, check the water heater works and the electrical panel has no tripped breakers.
- Provide keys and access instructions: Clear written instructions (in Spanish if the contractor does not speak English) for alarm codes, communal entry systems, where to park, where to dispose of waste.
- Inform neighbours: A polite note (in Spanish) under their door or in the mailbox explaining the work dates and apologising in advance for noise goes a long way.
Post-Renovation Handover
When work is complete, inspect thoroughly—in person if possible, or via video call with your local representative. Check:
- All taps and the shower run without leaks. Turn them on full, check under the basin and around the shower tray.
- Toilet flushes properly and refills. Listen for running water, which indicates a faulty valve.
- Tiles are level, grout lines are consistent, no cracks or hollow-sounding tiles.
- Silicone seals are neat, continuous, no gaps.
- Extractor fan runs quietly and vents to outside.
- Lights and shaver socket work.
- Doors and drawers on vanity units open smoothly.
- No construction debris left behind.
Ask for spare tiles (a box or two) and spare grout in case you need to repair damage in future. Request copies of all product manuals and warranties, especially for the shower valve and extractor fan.
Maintaining Your Renovated Bathroom Between Visits
A new bathroom in a holiday home needs minimal maintenance, but a few simple steps keep it in top condition.
- Leave the extractor fan on a timer or humidistat so it runs for 20–30 minutes after each shower, even when you are not there.
- Wipe down the shower screen and tiles after use to reduce limescale build-up. Keep a squeegee hanging in the shower.
- Run all taps briefly once a month if the property stands empty. This prevents trap seals drying out (which lets drain smells in) and keeps valve seals lubricated.
- Check under the basin and around the toilet base periodically for any signs of leaks or damp.
- Arrange for a local cleaner or property manager to air the property (open windows for an hour) once a month if it is empty long-term. Fresh air reduces humidity and mould risk.
Final Thoughts on Bathroom Renovation Holiday Home Guardamar Projects
Renovating a bathroom in your Guardamar holiday home from abroad is entirely feasible with the right planning, a trustworthy contractor and clear communication. Focus on durable, low-maintenance materials suited to the coastal climate, allow realistic timelines with contingency for surprises, and establish reliable remote oversight through photos, video calls and a local contact. The result is a modern, functional bathroom that enhances your property's comfort and value, whether you use it yourself or rent it to holidaymakers. Taking the time to understand local conditions—hard water, humidity, older building quirks—and addressing them during renovation saves headaches and expense down the line.
FAQ
Do I need a permit to renovate a bathroom in my Guardamar holiday home?
Bathroom renovation typically requires a minor works declaration (declaración responsable) or licence (licencia de obra menor) from Guardamar town hall, especially if you move plumbing or alter the building exterior. Simple replacements of fittings and tiles may be exempt. Always confirm current requirements with the town hall or your contractor before starting work, as rules vary and unpermitted work can result in fines.
How long does a typical bathroom renovation take in a holiday home?
A standard bathroom renovation—removing old fittings, retiling walls and floor, fitting new sanitaryware and shower—takes two to three weeks once work begins. Add extra time for material delivery (which can take two to four weeks if items are ordered specially) and for any unexpected issues like replacing old pipes or repairing damp damage. Plan for three to four weeks total from start to final handover.
What are the most common problems in older Guardamar bathrooms?
Hard water causes severe limescale build-up on taps, tiles and shower screens. Poor ventilation in older flats leads to mould on grout and silicone. Ageing galvanised or early plastic pipes corrode and leak behind tiles. Lack of waterproofing under old tile installations allows water to seep into walls and floors, causing damp and structural damage over time.
Can I manage a bathroom renovation remotely if I live abroad?
Yes, with the right systems. Choose a contractor who provides detailed written quotes and regular photo or video updates. Appoint a trusted local contact (friend, neighbour or property manager) to visit the site once or twice during the project. Use video calls to inspect progress and make decisions. Clear communication and a fixed-price contract are essential for successful remote management.
What materials work best for a low-maintenance holiday home bathroom?
Large-format porcelain tiles (30×60 cm or bigger) with rectified edges and narrow grout lines are easiest to clean. Epoxy grout in wet areas resists mould and staining. Chrome or brushed steel taps handle coastal humidity better than painted finishes. Wall-hung sanitaryware and floating vanity units simplify floor cleaning. A powerful extractor fan (100 m³/h minimum) with humidistat control prevents mould when the property is empty.